
Products
Solutions
Resources
9977 N 90th Street, Suite 250 Scottsdale, AZ 85258 | 1-800-637-7496
© 2024 InEight, Inc. All Rights Reserved | Privacy Statement | Terms of Service | Cookie Policy | Do not sell/share my information

The Resource Management function provides schedulers with the ability to account for and report on the project resources (for example, labor, materials, or equipment) that are needed to plan the scheduled work.

From a shared organization resource pool, schedulers can assign the required resources to activities. With the resource utilization data, InEight Schedule can assess cost and time impacts in a time-phased manner.
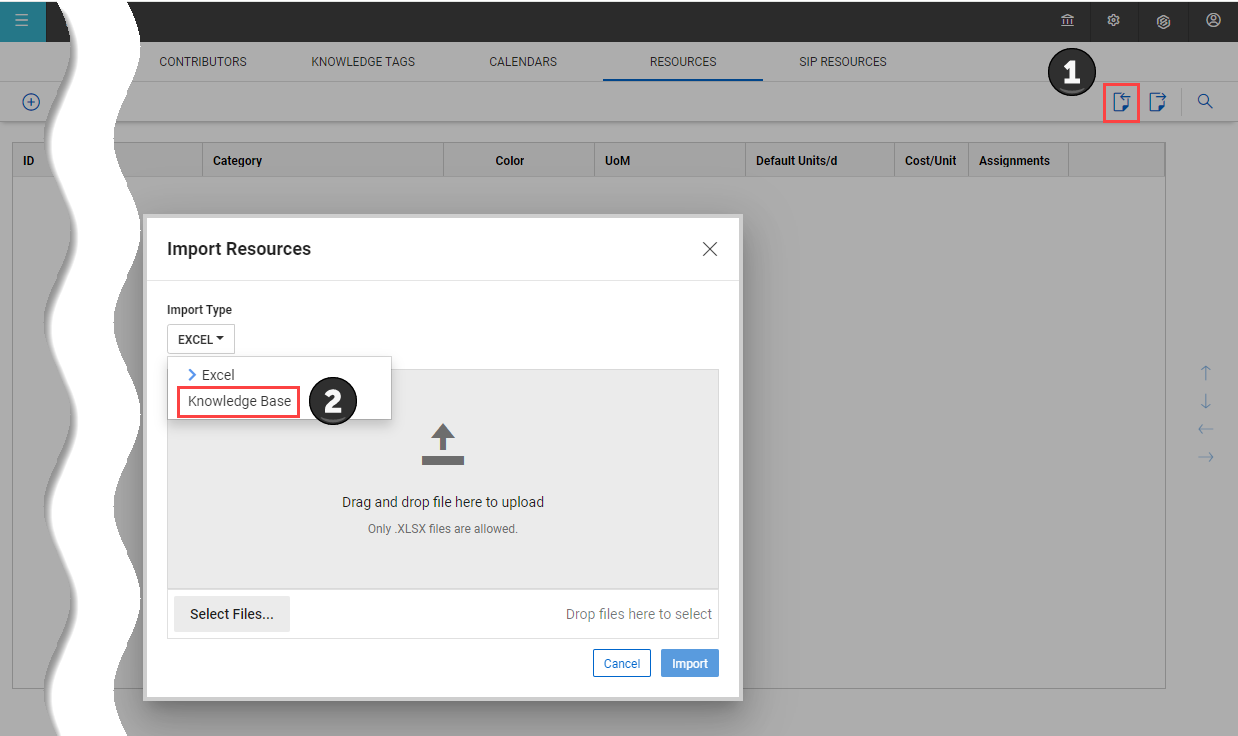
Click on the Import Resources icon, and then select Knowledge Base from the Import Type drop-down menu.
Select the Knowledge Base resources that you want to include in your project, and then click Import.
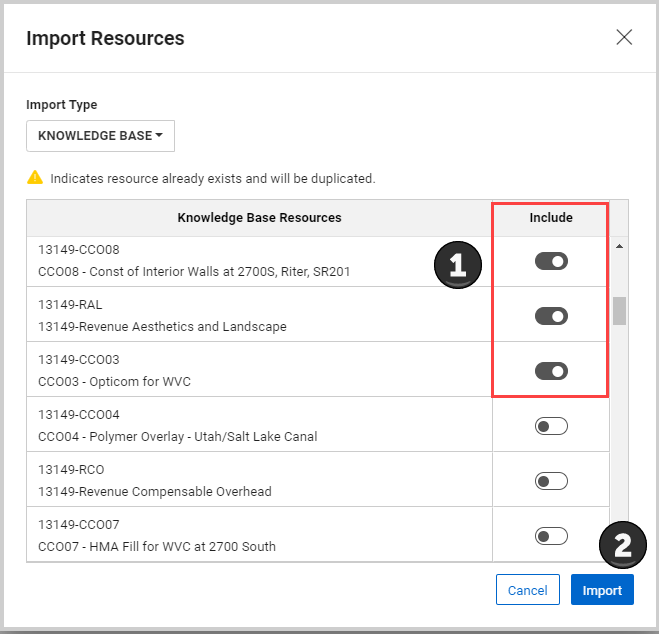
The  symbol indicates that the resource already exists and will be duplicated.
You will see an Import Successful message. Select OK.
The selected resources are now imported into the project from the Knowledge Base Resource register.

Resources are assigned to activities (activity level) but can also be set via work packages (summary level) in the schedule. You can assign the same resource multiple times to a single activity.
The setting that allows the same resource to be assigned more than once is on by default. If needed, with the applicable permissions the toggle can be set to Off in Schedule Configuration > General > Enable Duplicate Resource Assignments.
From Plan view, you can access the resource assignments of the assigned by using the options below:
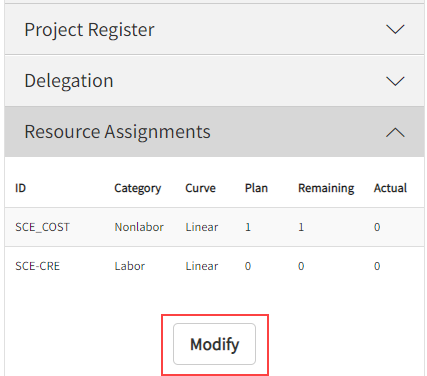
Open an Activity’s details in the Iris, expand the Resource Assignments section, and then select Modify.
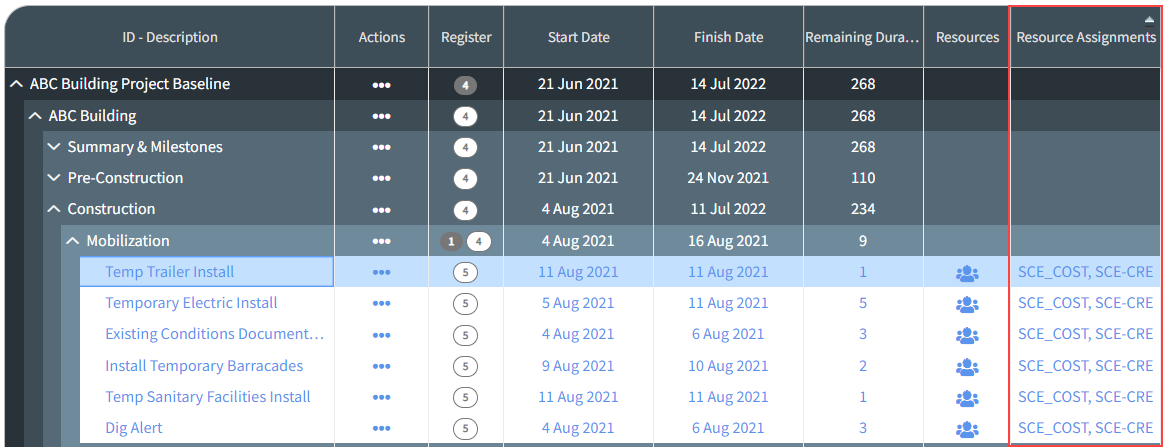
Customize the Gantt Chart view to include the Resources Column, and then select the Resources icon directly in the Gantt Chart.

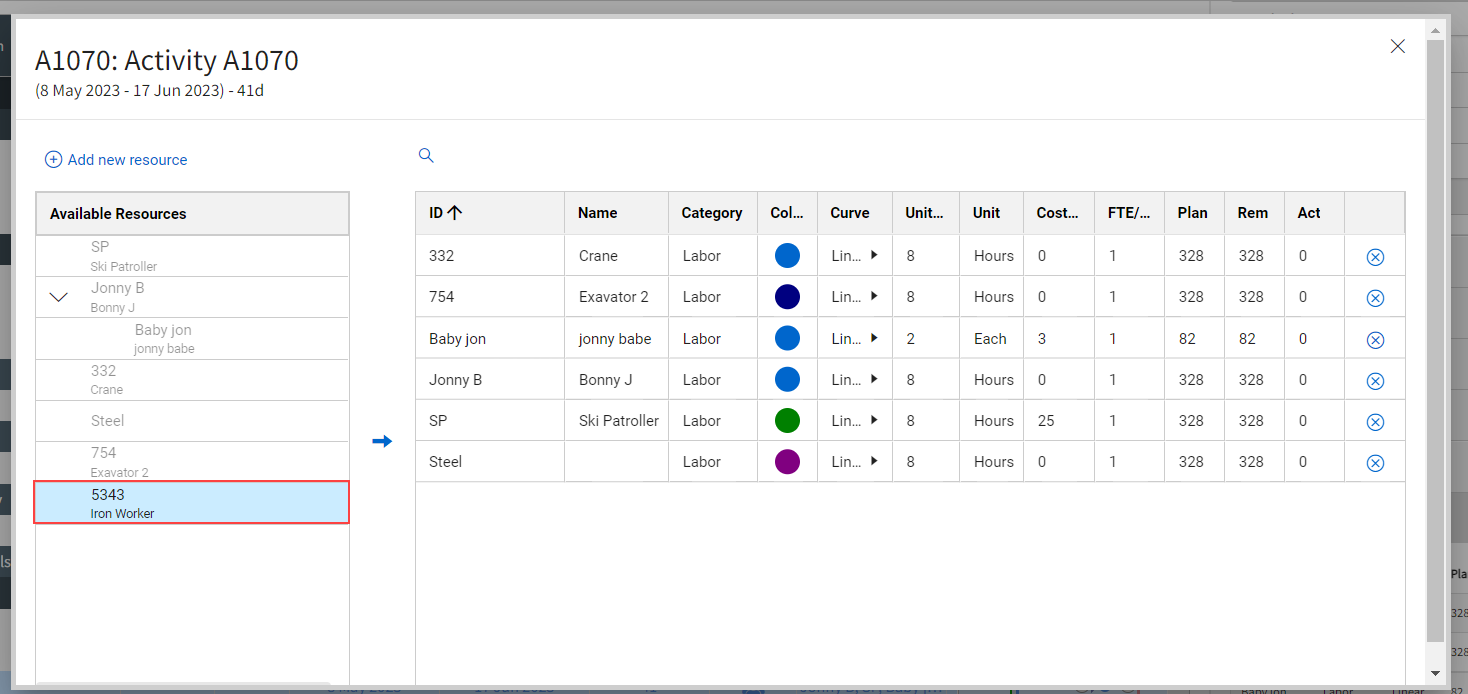
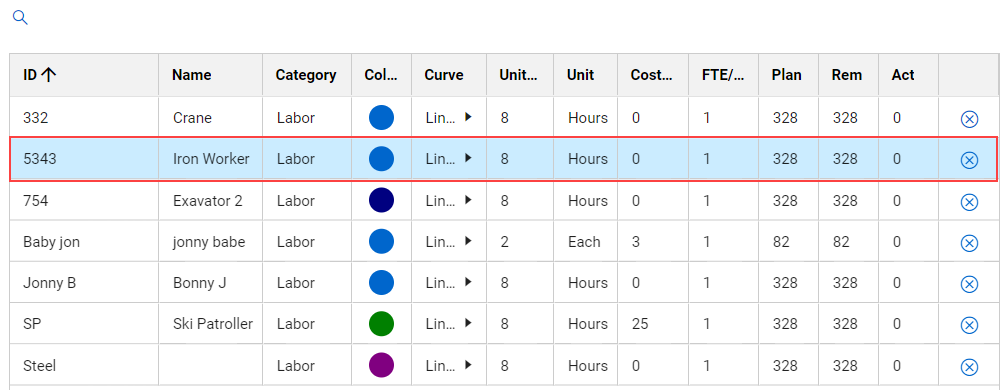
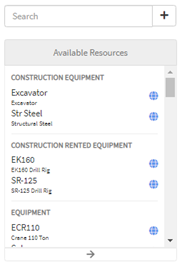
All available resources can be found quickly using the Search function in the resource assignment window.
After the resource is selected, click the right arrow icon to add the resource to the activity’s Resource register.

When the resource is added, details for each resource can be modified for the activity. Fields that can be adjusted at this level include Curve, Units/d, Cost/Unit, FTE/Qty, and Plan.
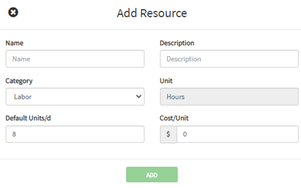
If a resource is not available in the Project’s resource register, a new resource can be created directly from the Resource Assignment window. See "Creating Project Resources via Resource Assignment" topic.
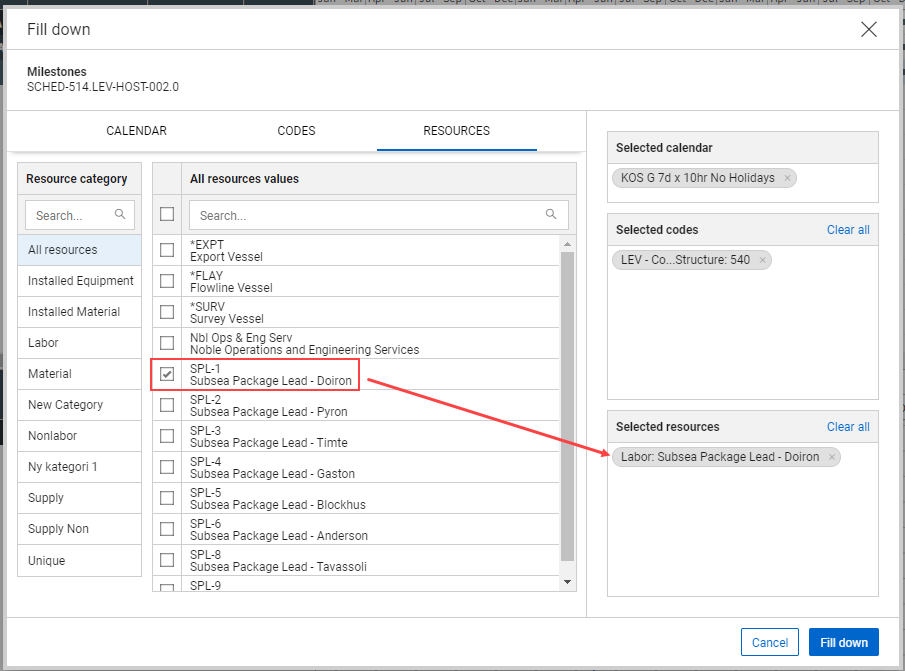
The Fill Down function lets you fill down a calendar, code or resource from the summary level. You select the items to fill down, the system fills down the selections and processes the items to all child level elements.
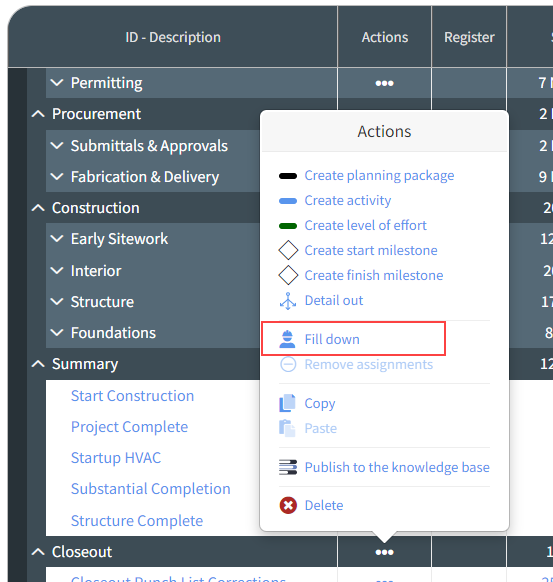

In the Actions menu, select Fill Down.

The Fill down window shows.
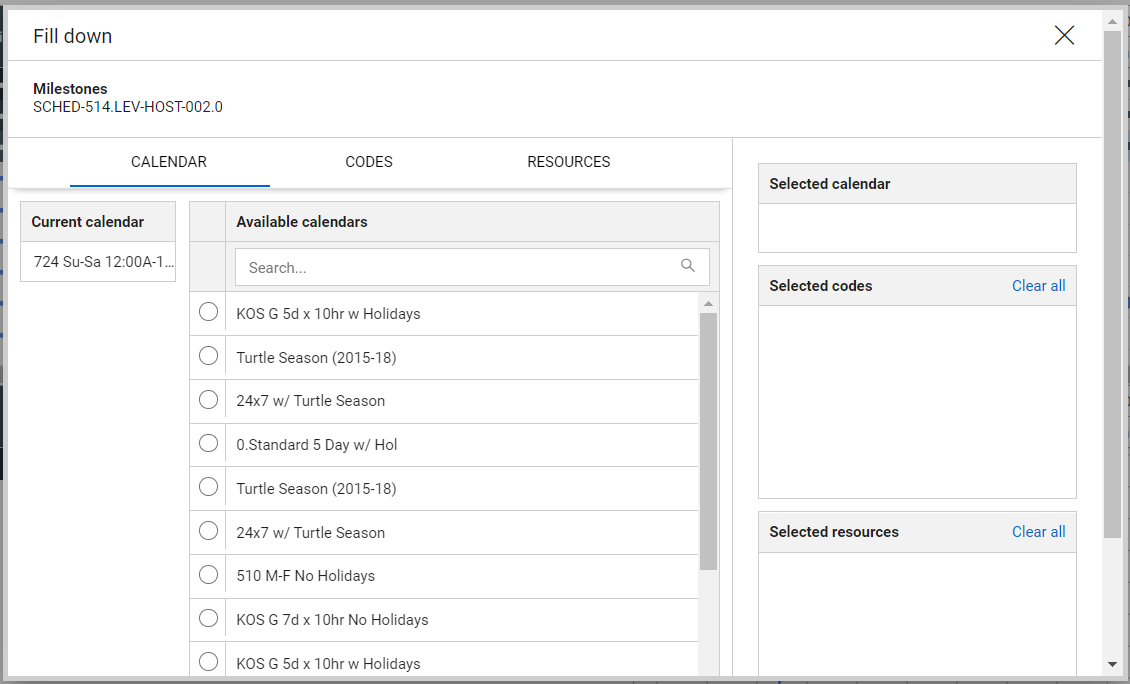
On the Calendar tab, select from available calendars.

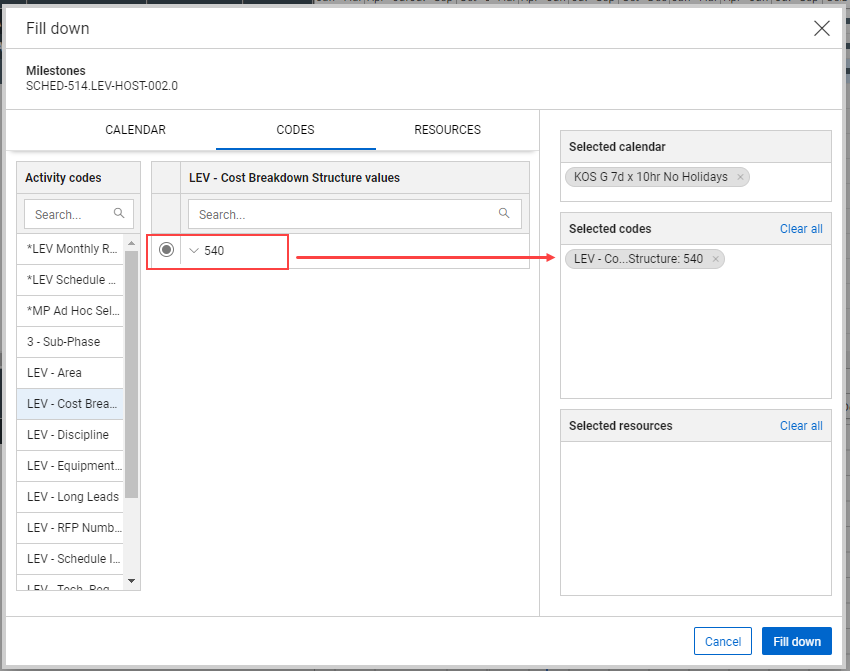
All assignments made from this window flow down to all subordinate activities.
All available resources can be quickly found using the search function in the resource assignment window. If a resource cannot be found or a project specific resource is to be made, see the “Creating Project Resources via Resource Assignment” section for more information.
Resources can still be further edited at the activity level even when set up from the summary level. Plan values are not editable when applying a resource at the summary level but can be adjusted act the activity level.
After a schedule has been loaded with resources, Schedule can generate a resource histogram.
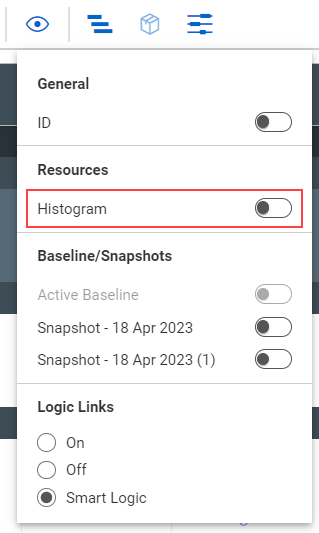
A histogram shows below the Gantt Chart. The resource histogram plots resource utilization over time depending on the following:

|
Setting |
Function |
|---|---|
|
Resource Histogram |
You can switch the Resource Histogram view on or off. |
| Comparison Mode | Compares Current, Active Baseline, and Snapshots in the Resource Histogram. |
|
Status |
Filters histogram to show Planned, Actual resource quantities, Remaining or Remaining Late. |
|
Display |
Adjusts the Y-axis of the histogram to show Units, FTE, or Cost. |
| Unit |
The resource’s unit of measure. |
|
S-Curve |
Switches on or off the S-Curve on the resource histogram. |
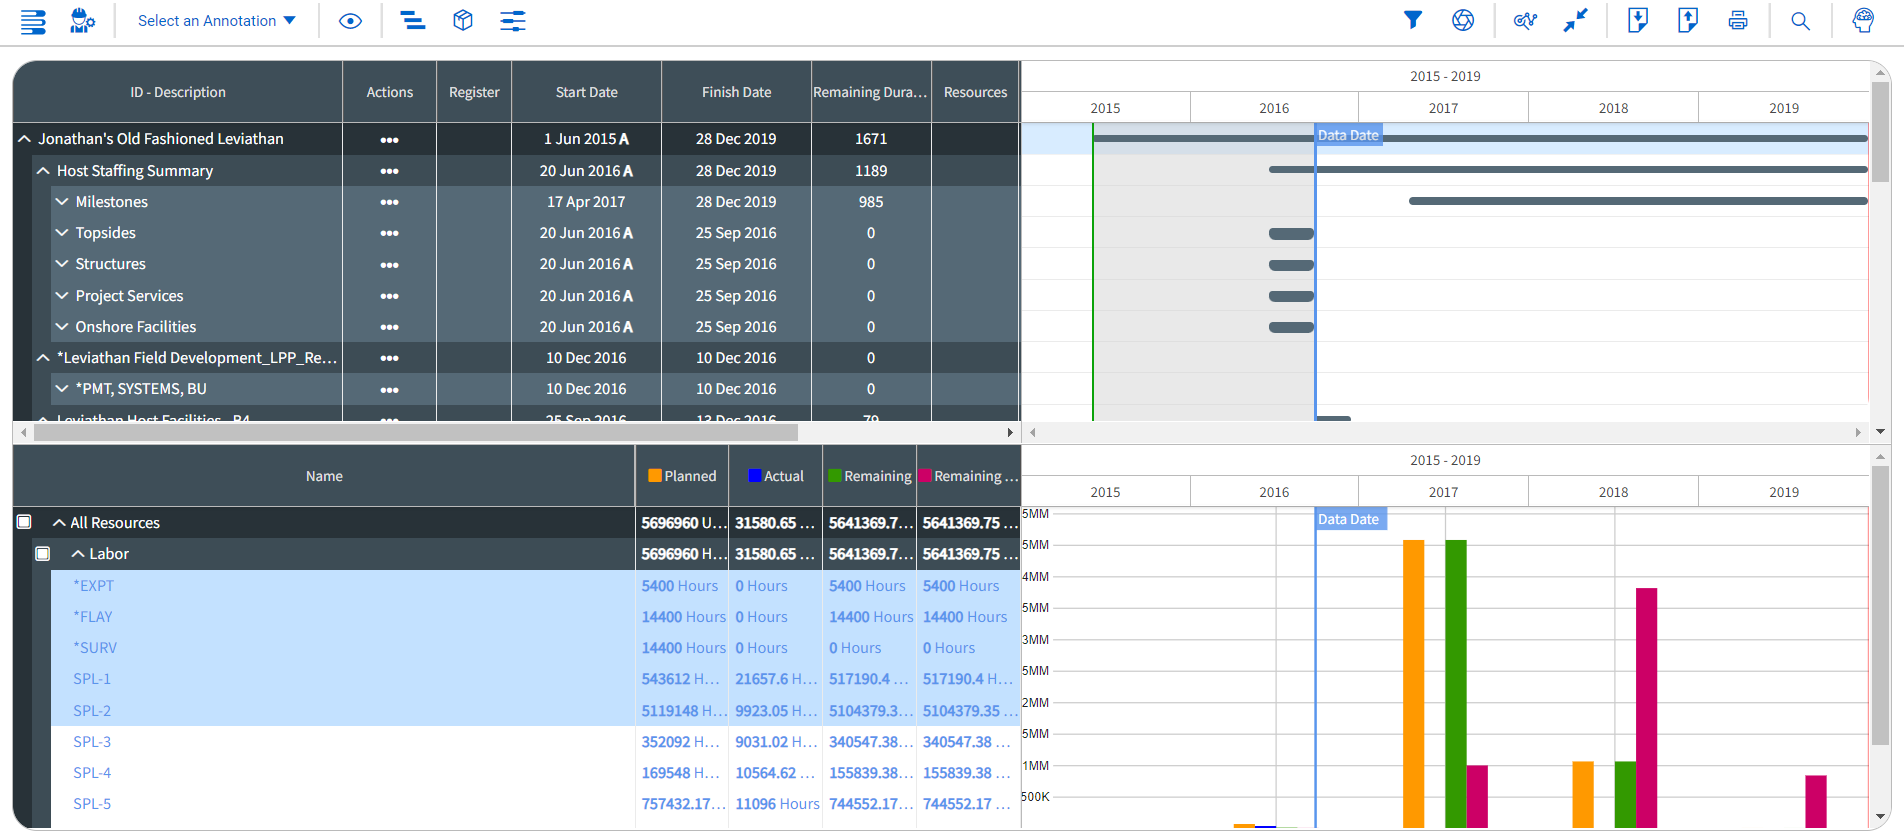
The activity or summary level selected in the Gantt Chart: The resource histogram plots out data based on the activity or planning package selected in the schedule
The zoom level selection: The zoom level for the Gantt chart controls both the schedule and resource histogram X-axis units of time that is days, weeks, months, quarters, years or decades.

Set the Resource Setting Configuration Status to Planned & Remaining.
This populates the Resource Histogram with all planned and remaining resources for the activity or planning package selected.
Change the Resource Setting Configuration Display from Units to Cost.
FTE stands for Full Time Equivalent, and is the count of people per time period.
Burn rate is the percent planned per period of time.

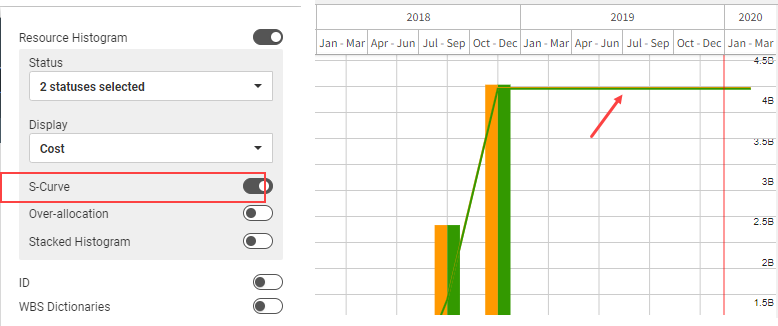
S-Curves reflect cumulative data. As the values increase over time, this reflects the accumulation of resource units/FTE/cost, depending on settings, over time.
Filtering by resource only applies if the stacked resource histogram is turned to On.In the filter functionality, the Gantt chart & resource histogram can be filtered to see planning packages and activities assigned specific resources. When the resource histogram is switched on, it can be used as an interactive filter as well. Selecting a Resource Name listed in the histogram or any of the resource bars will filter down the Gantt Chart and Resource Histogram to show only data pertaining to the information selected.
In the image below, the Resource Histogram is filtering based on the selected resource: Concrete Finisher.
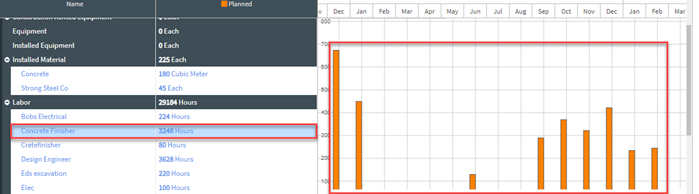
Additionally, to modify or disable the resource filtering, users may click the filter icon to make adjustments to the filter parameters.
In View Options, you can view the histogram in comparison mode, when enabled.
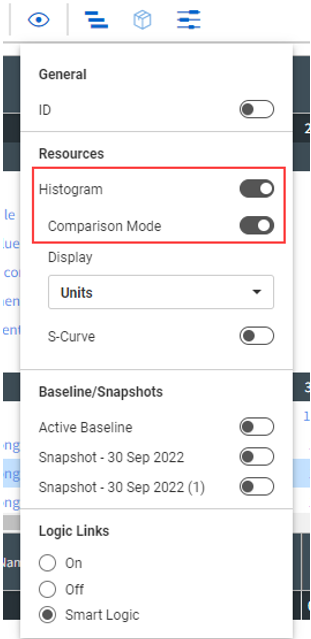
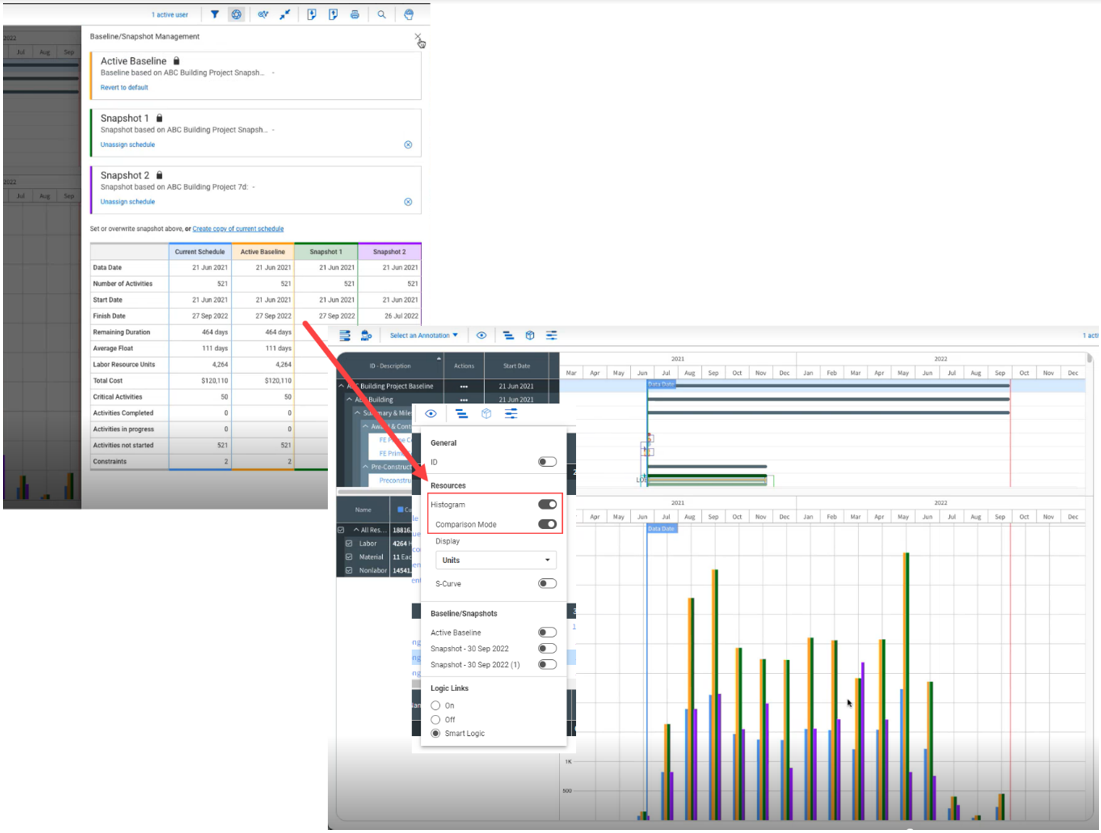
When the Comparison mode toggle is set to On, the baselines and snapshots that exist in the Baseline/Snapshot Management show as a graph with the current baseline. The histogram compares resources rolled up to the category type and shows you resources as they trend.
Each line in the graph represents a baseline, snapshot, and the current estimate.
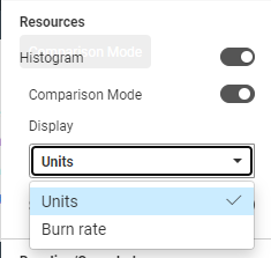
The histogram graph can now also be shown in units and burn rate.
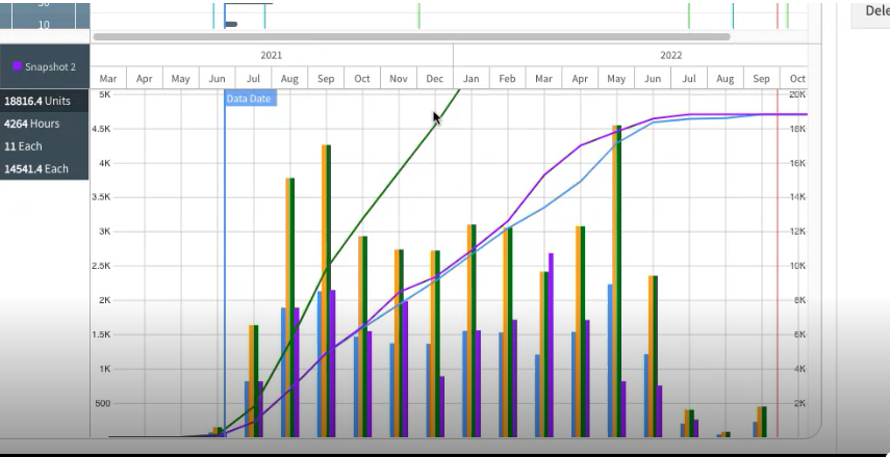
You can also view the histogram with an S-Curve that shows you a cumulative trend line for each baseline, snapshot and current.
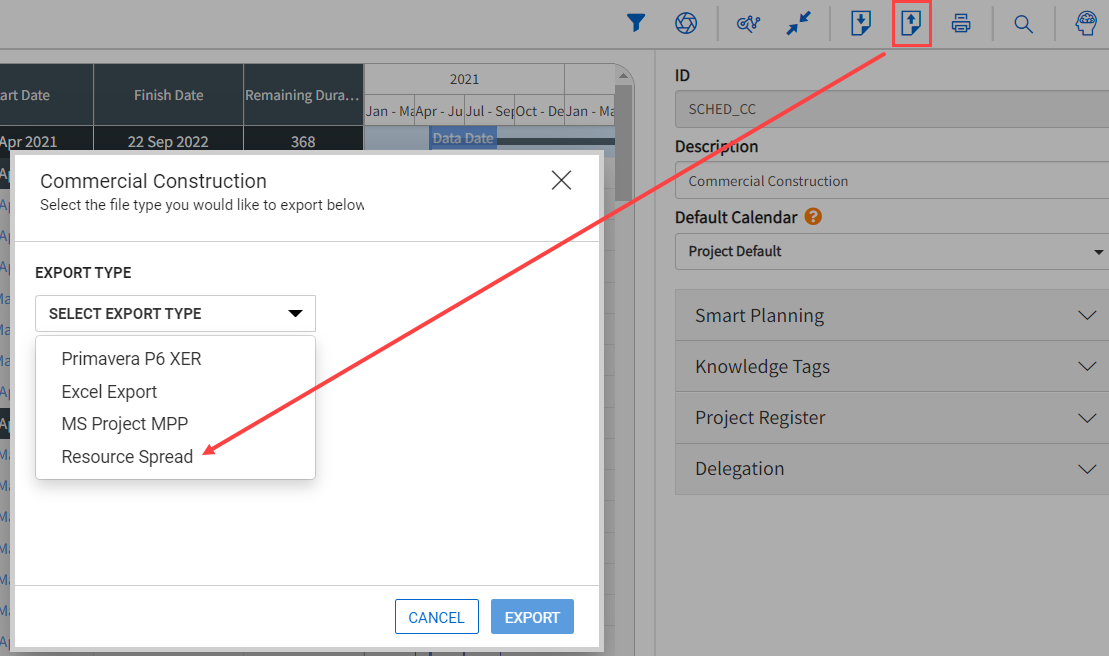
Schedule export functionality includes the ability to export resource assignments. You can export resource spread data that shows every resource and hours worked for every day of the entire schedule selected.
In Plan view, select the Export icon, then select the Resource Spread export type from the drop-down menu to send the data to a reporting API.
To export the data from the Project List page, select a schedule and then click the Generate resource spread export icon.
Resources in a Project are either global resources or project specific resources. Global resources automatically populate a project’s resource register from the Knowledge Base. If a resource is not available from the established global resources, project specific resources can be set up.
Project specific resources are useful when the resource utilized is unique to that project and not applicable across the organization.
To establish project specific resources:
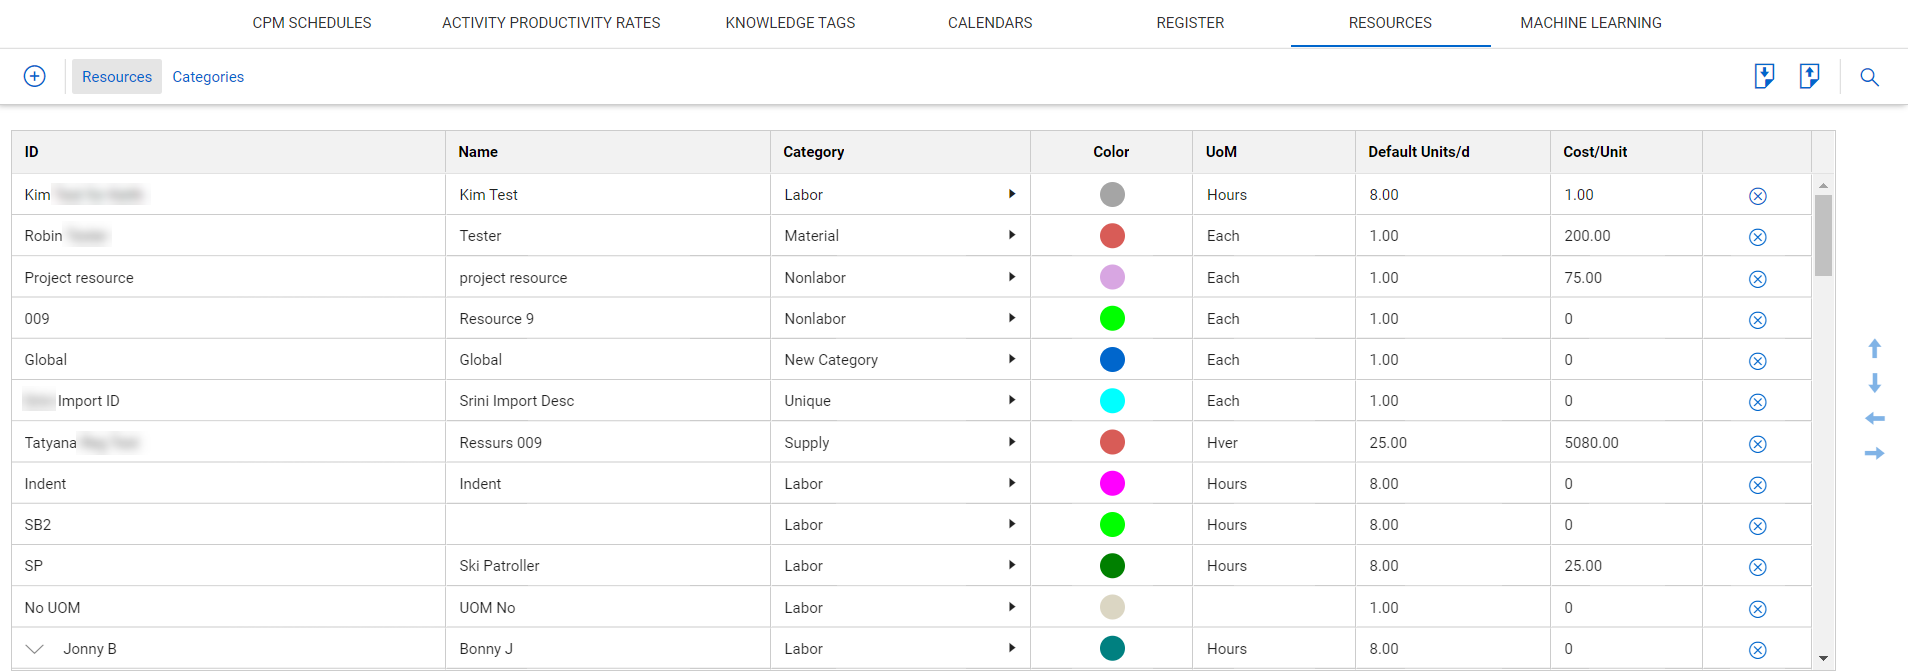
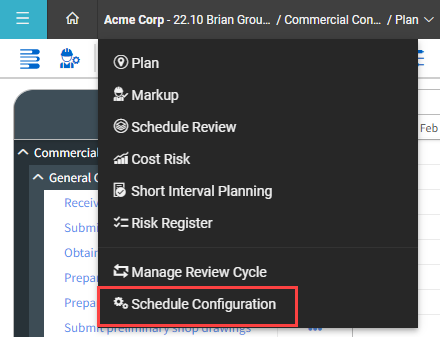
Select Schedule Configuration from the project drop-down menu.
This brings you to the project-level resource register

The Project level resource register functions the same as the Knowledge Base. See Setting up Resources for information about how to add resources and use the Import/Export functionality in the Resources register

Schedule possesses the concept of global and project specific resources. When you create a schedule, it does not populate the resources in the Schedule Configuration window, but you can import resources from the Knowledge Base to use in your schedule.
Project Specific Resources can also be created from the Resource Assignment window in the Planning view.
Additional Information
9977 N 90th Street, Suite 250 Scottsdale, AZ 85258 | 1-800-637-7496
© 2024 InEight, Inc. All Rights Reserved | Privacy Statement | Terms of Service | Cookie Policy | Do not sell/share my information